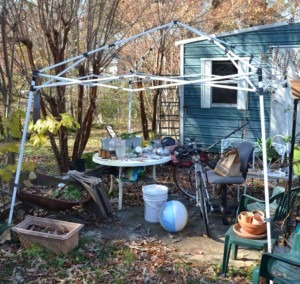
Readers of this blog know that Jean is an avid gardener. One of the problems we face each year is what to do with many of our plants during the winter to protect them from the cold. Most of the time, our decision is to bring all the plants inside — and with our small house, that is no easy feat.
This winter, we decided to do something different. We had taken down our frame pool for the season and were wondering what to do with the space in the backyard when Jean came up with the idea of using an old E-Z Up canopy frame as the basis for a greenhouse that would both protect our current plants as well as give Jean a space where she could garden all year long!
Some background: One of our favorite spots in our home is our deck. We enjoy it mainly during the summer months, but as the deck faces the west, it often gets uncomfortably warm and bright. We decided to use the canopy as a shade, and for several seasons, it made our deck even more of an oasis than it already was. However, after about three years of being exposed to the weather on a constant basis, the canvas top started showing holes and tears. We replaced the canopy on the deck with a larger one and put the old canopy in the back yard, where it sat, waiting for us to figure out what to do with it.
Once Jean came up with the concept for the greenhouse, I went to work figuring out how to make it happen. To keep with the All Deluxe All The Time theme, we wanted to use as many reclaimed materials as we could. Of course, the cost was an issue as well — this was not a project we wanted to spend hundreds of dollars to make happen. Also, because I am not the most talented handyman around, I knew I had to keep the project simple.
What happened next may not be the stuff of legend, but it did end up creating a greenhouse which has withstood wind, rain, and snow while keeping Jean’s plants alive.
Scavenging for materials
In planning the greenhouse, I knew I would need some kind of base to go around the bottom of the canopy frame. Rummaging around our shed, I found a number of boards which in a previous life served as the frame to a futon couch. Also, like pretty much every family I know, we had several jars and tins chock full of bolts, screws, and other assorted hardware which provided all the fasteners we needed for the job. And, as any good Southerner knows, if you can’t fix something (or in this case, build something) with duct tape, you might as well just buy a new one.
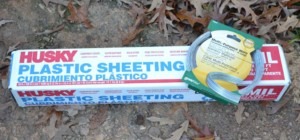
In the end, the only products we bought for the project were a 100-foot roll of 10-foot-wide, 4-mil plastic sheeting, two 200-foot coils of bailing wire, and a heat bulb — all of which cost us less than $60.00. I could have done without the second roll of wire, but I wanted to make certain I had plenty to do the job.
Building the greenhouse
The first thing I did was to join the futon boards together so they would be long enough to go around the base of the canopy. I cut one board into pieces about six inches long and used those pieces as joiners between the two boards.
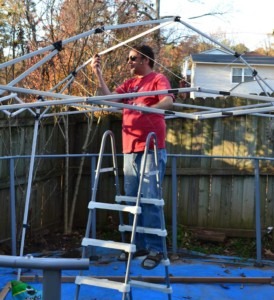
Once I had four base pieces put together, I moved on to reinforcing the canopy frame. I used lengths of bailing wire to create a second frame on the canopy frame, creating something similar to a geodesic dome structure that would keep the plastic from sagging under the weight of water, snow, or ice.
Next, I took the bailing wire to make cross-bracings on three sides of the canopy frame, essentially making giant X-shapes on each side.
Then it was time to start working with the plastic sheeting. I cut two lengths of sheeting, each approximately 30-feet long. I took one of the lengths of sheeting and placed it at the base of one side of the canopy frame, unfolded it to its full width, and wrapped the end around one of the baseboards. Then I used screws to fasten the sheeting to the board. Small pieces of duct tape, torn into squares and placed on the plastic where the screws went in, reinforced the sheeting and helped to keep it from tearing during this process.
Jean and I then took the other end of the sheeting and draped it across the top of the canopy frame and down the opposite side. Using the same procedure, I fastened the plastic to the baseboard. Our greenhouse had two sides and a roof!
To make the other two sides of the greenhouse, we did the same thing with the other piece of sheeting, starting from what would eventually be the back of the greenhouse and moving over the top to the front.
To create a door, I made three cuts in the sheeting: Two horizontal cuts near the top and bottom of the front side of the canopy frame, and a vertical cut running between the two. I used duct tape to reinforce the cut edges of the sheeting, and then used some pieces of velcro I found in the shed to form a rudimentary method of keeping the doors shut. I covered the entry with another piece of sheeting attached to a futon board and fastened the entire assembly to the canopy frame. A second piece of futon board attached at the bottom of the flap provided some weight to help keep the “door cover” in place.
We used the tried-and-true “gift wrap” method of tucking and folding the excess plastic out of the way and placed strategic lengths of duct tape over the seams. Once we ran an extension cord into the structure and plugged in a power strip for lighting (both of which we already had around the house), we were done!
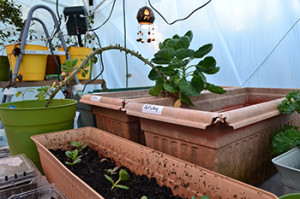
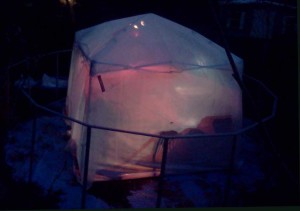
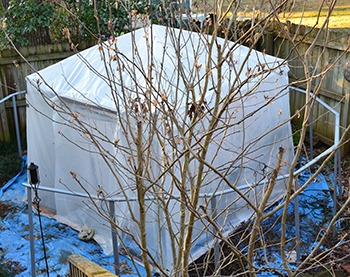
To date (and at this point, it has been a little more than two months since we built the structure), the greenhouse has performed better than I expected. When the first good rain came, I assumed it would blow away. It didn’t. A radiant heat bulb keeps the chill out on the coldest nights, and so far no plants in the green house have died. It even stood up to three inches of snow on the “roof”!
Now we’ve got veggies on the way and Jean is a happy camper… er, farmer… all year ’round!
4 thoughts on “A quick-and-dirty greenhouse”
Comments are closed.
You guys are so clever! Color me impressed!!
Thank you, Stacie! Kind of you to say so.